
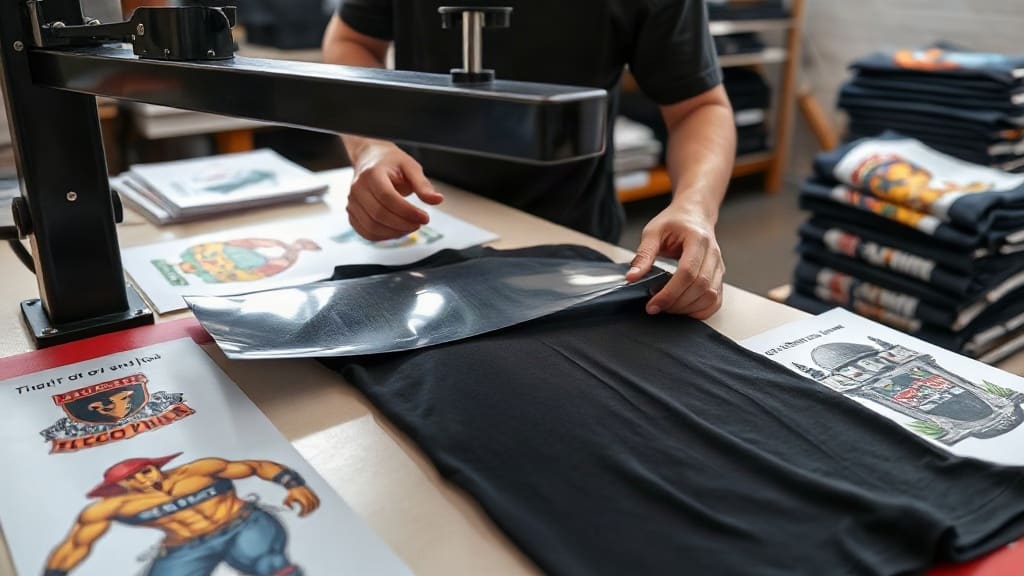
If you've been exploring custom apparel printing, you've likely encountered DTF transfers. These innovative heat-applied designs have taken the industry by storm, offering a unique combination of versatility, vibrancy, and durability. But what exactly are they, and how can you make the most of them? In this comprehensive guide, I'll walk you through everything you need to know, from the basics to advanced tips, so you can create stunning prints that stand the test of time.
What Are DTF Transfers?
DTF stands for Direct to Film. It's a printing method where designs are printed onto a special film using a DTF printer, then transferred onto fabric with a heat press. Unlike traditional screen printing or heat transfer vinyl, DTF transfers are known for their exceptional detail and color vibrancy. They work beautifully on a wide range of fabrics, including cotton, polyester, blends, and even nylon, making them a favorite among small business owners and DIY enthusiasts.
Why Choose DTF Transfers?
There are several compelling reasons to choose DTF transfers for your printing projects:
- Vibrant Colors: DTF prints boast rich, saturated colors that pop on any fabric.
- Exceptional Durability: They can withstand repeated washing without cracking or fading, making them ideal for everyday wear.
- Versatility: Works on both light and dark fabrics, without needing a white underbase separately.
- Soft Hand Feel: The prints have a soft, flexible texture that doesn't compromise the comfort of the garment.
- Cost-Effective for Small Runs: No setup fees, perfect for custom orders and on-demand printing.
How DTF Transfers Are Made: Step-by-Step Process
Understanding the process helps you appreciate the quality and also troubleshoot if things go wrong. Here's how a typical DTF transfer is created:
- Printing: A specialized DTF printer prints your design in reverse onto a PET film using CMYK plus white ink.
- Powdering: While the ink is still wet, a hot-melt adhesive powder is applied to the film. This powder sticks only to the white ink areas.
- Drying: The film passes through a curing oven or heat tunnel to melt and set the adhesive powder.
- Transfer: You receive the film, ready to press. Place it on your garment, apply heat and pressure with a heat press, and peel away the film.
Tips for Perfect DTF Transfer Application
Getting great results isn't just about the transfer itself; it's also about how you apply it. Here are some tips I've learned from experience:
- Use Proper Heat and Pressure: Typically, you'll need around 300°F (150°C) and medium to firm pressure for 10-15 seconds. Always check the manufacturer's recommendations.
- Pre-Press Your Garment: This removes moisture and wrinkles, ensuring a smooth transfer.
- Peel Method: Some transfers require hot peel, others cold peel. Follow the instructions. Cold peel often gives a shinier finish, hot peel a matte one.
- Test First: Before doing a full run, test on a sample piece to ensure your settings are perfect.
Comparing DTF Transfers to Other Methods
To truly appreciate DTF transfers, it helps to compare them with alternatives:
DTF vs. Screen Printing
Screen printing is great for large orders with bold colors, but it requires significant setup and has high minimum quantities. DTF offers more flexibility for detailed designs and smaller runs, with no setup costs.
DTF vs. DTG (Direct to Garment)
DTG prints directly onto the shirt, but it can be slower for bulk orders and sometimes struggles with textured fabrics. DTF is often faster for production and works better on polyester.
DTF vs. Heat Transfer Vinyl (HTV)
HTV is great for simple designs with few colors, but cutting and weeding is time-consuming. DTF handles full-color, intricate designs effortlessly.
Ordering DTF Transfers: What to Consider
If you're thinking of ordering custom DTF transfers, here are key factors to keep in mind:
- File Setup: Use high-resolution PNG files at 300 DPI with a transparent background. This ensures crisp edges and proper color separation.
- Sizing: Check the maximum width your supplier can print. Common sizes are 8.5" x 11" or 13" x 19".
- Turnaround Time: Typically 2-5 business days for production, plus shipping.
- Cost: Prices vary based on size, quantity, and complexity. Ordering in bulk can reduce unit cost.
- Samples: Always order a sample first to check quality before making a large order.
Common Mistakes and How to Avoid Them
Even seasoned printers make mistakes. Here are some common pitfalls and how to sidestep them:
- Skipping Pre-Press: This can lead to poor adhesion and cracks after washing.
- Using Wrong Temperature: Too high can scorch the film, too low won't activate the adhesive properly.
- Peeling Too Fast: If you need a cold peel, wait until the film is completely cool to avoid lifting the design.
- Neglecting to Test with Your Fabric: Different fabrics may react differently, so always test with the exact material you plan to use.
Maintaining and Washing DTF Printed Garments
To extend the life of your DTF prints, proper care is essential. Here are some washing instructions to share with your customers:
- Wash inside out in cold water
- Use mild detergent
- Avoid bleach and fabric softeners
- Tumble dry low or hang dry
- Do not iron directly on the print
Frequently Asked Questions
Can DTF transfers be applied to non-cotton fabrics?
Absolutely! One of the biggest advantages of DTF transfers is their versatility. They adhere well to cotton, polyester, nylon, and blends. However, for high-polyester fabrics, you might need a lower temperature and a longer pressing time to avoid melting the fabric.
How long do DTF transfers last?
With proper application and care, DTF prints can last for many washes, often 50 or more, without significant fading or cracking. The key is a correct heat press and following washing instructions.
Do DTF transfers work on dark fabrics?
Yes, they are excellent for dark fabrics because the white ink base ensures that vibrant colors pop without needing a separate underbase. That's a major plus compared to some other methods.
What is the difference between hot and cold peel DTF transfers?
Hot peel means you remove the film immediately after pressing, while cold peel requires waiting for it to cool. Hot peel often yields a matte finish, while cold peel gives a semi-gloss. It's a matter of preference and the specific product.
Can I reuse DTF transfer film?
No, the film is designed for one-time use. Once you've pressed it, the adhesive is spent, and reusing would result in poor adhesion and print quality.
Conclusion
DTF transfers are a fantastic option for anyone looking to create high-quality, durable custom apparel. Whether you're a business owner, a hobbyist, or someone just starting out, they offer simplicity and outstanding results. By understanding the process, following best practices, and avoiding common mistakes, you'll be producing professional-grade prints in no time. So go ahead, give DTF transfers a try, and watch your designs come to life with stunning vibrancy and longevity.